Step 1: Ensure that you have submit your job and come to the correct printers. Please review Printing in Library guide for reference.
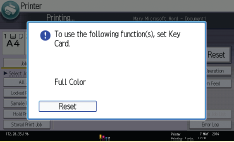
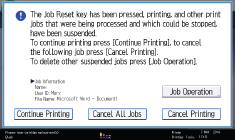
Press [Reset], then press "Cancel All Jobs" and "Yes" to clear all previous print jobs.
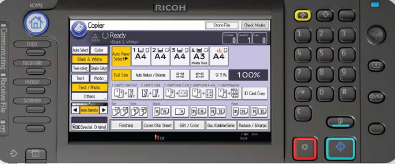
Step 2: Select the function
press [Printer] button on the panel.
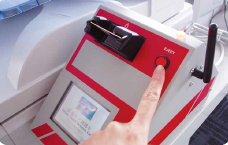
Step 3: Insert Octopus Card
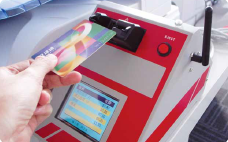
Please make sure you have sufficient fund. No value-added service are available in Library
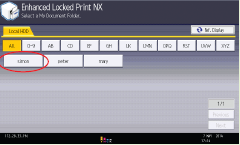
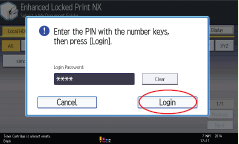
Step 4: Select your User ID and enter the PIN, then select your Print job
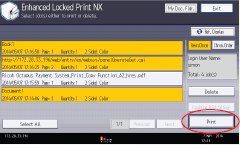
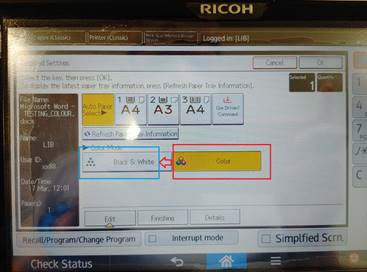
Step 5: Before confirming your printing, you may choose to print the job directly by hitting "Print" or switch between B&W or Colour at "Detailed Setting"

Step 6: After finish your printout. Remember to get back your Octopus card

You may also refer to the official documentation from Ricoh here.
For more information about printing, please approach Technical Support Desk on 4/F for assistance.
* Important note: Octopus card on mobile payment method is not compatible with printing / copying service.

 PolyU Library AI Chatbot